
You finally picked the perfect color. Maybe it’s a cool gray to combat the heat or a warm beige to brighten up the living room. You have the rollers, the tape, and the drop cloths. But as you stand in the middle of the room, a question pops up: Where do I actually start?
Do you roll the walls first? What about the trim? If you do things out of order, you might end up dripping white ceiling paint onto your freshly colored walls. It is a frustrating mistake that happens more often than you think.
Getting the sequence right is the secret to a professional-looking job. It saves you time, money, and a lot of cleanups. Whether you're looking into exterior painting to boost curb appeal or refreshing your bedroom, following a logical order makes the process much smoother. Here is the step-by-step breakdown of how to paint a room the right way.
Why is preparation the most critical step?
You cannot build a house on a shaky foundation, and you cannot paint a wall that is dirty or uneven. If you skip the prep work, your new paint might peel or bubble, especially given the humidity we deal with here in Orange County.
Start by moving furniture to the center of the room and covering it. Remove switch plates and outlet covers. Next, clean the walls. Dust and grime prevent paint from sticking properly. If you're painting over a glossy surface or if the walls have stains, you need to use a primer. This acts as a glue for the topcoat and ensures the true color shines through.
Taking the time to tape off edges and patch nail holes now will save you hours of frustration later. It might feel tedious, but it's the difference between a messy DIY job and a crisp, clean finish.
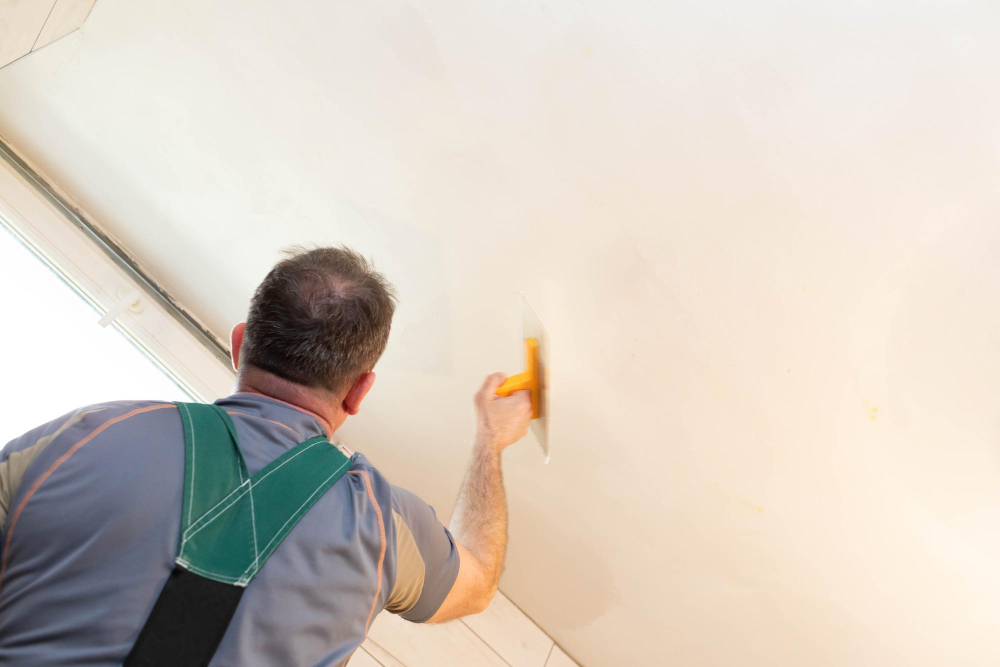
Should you paint the ceiling or walls first?
Always start with the ceiling. Gravity is the main reason here. When you use a roller on the ceiling, tiny mist droplets (and sometimes big drips) will inevitably fall downward.
If you paint the walls first, those drips will land right on your perfect new color. By painting the ceiling first, it does not matter if you get a little splatter on the walls because you're going to paint over them anyway.
We recommend using a flat or matte finish for ceilings. This hides imperfections and reduces glare from lights or windows. Once the ceiling is dry, you can move on to the next step without worrying about gravity ruining your hard work.
How do you tackle the walls without making a mess?
Once the ceiling is dry, it's time for the main event: the walls. This is where your room really starts to transform.
If you're tackling interior painting in Orlando Florida, you know how the light changes throughout the day. From the bright morning sun in Oviedo to the afternoon shade in Winter Park, your wall color sets the mood.
Start by "cutting in." This means using a brush to paint a 2- to 3-inch strip along the corners, ceiling line, and baseboards. A roller simply cannot get tight enough into these corners without hitting the other surfaces. Once you have cut in the edges, you can roll the large sections of the wall.
Since you already painted the ceiling, you don't have to be terrified of the roller hitting the top edge of the wall—you can cut in a clean line right up to it. For the best results, work in small sections and keep a "wet edge" to avoid lap marks.
If this sounds like a lot of physical work, that’s because it's. If you would rather spend your weekend relaxing at Lake Eola than climbing ladders, you can always check out our interior painting services. We handle the hard work so you don't have to.
When is the right time to paint the trim?
Save the trim, baseboards, and doors for last. Why wait until the end? It is much easier to tape off the painted wall than it is to tape off intricate trim work before you paint the walls.
Wait for your walls to dry completely—usually about 24 hours, depending on the ventilation and humidity. Then, run painter's tape along the edge of the wall where it meets the trim. This protects your wall color while you brush a semi-gloss or satin finish onto the baseboards and door frames.
This step gives your room that crisp, "framed" look. Homes with detailed molding, like many in Baldwin Park, really pop when the trim is done correctly.
How much does a painting project actually cost?
Budgeting for paint is about more than just buying a few gallons of color. You have to account for primer, brushes, rollers, tape, drop cloths, and your own time.
High-quality paint typically costs between $30 and $70 per gallon, depending on the brand and finish. If you're painting a standard 12x12 room, you might need two gallons for proper coverage, plus all your supplies.
If you make mistakes—like skipping primer or painting out of order—that cost goes up because you have to buy more product to fix it. Doing it right the first time is the best way to save money.
How do you ensure a professional finish?
The job is not done until the tape is gone and the touch-ups are finished. One common mistake is letting the tape sit too long.
Remove the painter's tape while the trim paint is still slightly tacky. If you wait until it's rock-hard dry, pulling the tape might peel up chips of your new paint. Pull the tape slowly at a 45-degree angle.
Finally, do a walk-through. Look for any spots you missed or areas where the old color is bleeding through. A tiny dab of paint on a small brush can hide these flaws easily.
Getting the job done right
Painting is one of the most effective ways to increase your home's value and change the way you feel about your space. But the sequence matters. By working from the top down—ceiling, then walls, then trim—you save yourself the headache of fixing drips and mistakes.
Whether you're updating a single room or planning a full interior painting in Orlando Florida project, following these steps ensures a result you can be proud of.
If looking at this list makes you tired, or if you just want to ensure the finish is flawless without lifting a finger, we are here to help. We are your neighbors, not a franchise, and we know how to make Orlando homes look their best.
Ready to transform your home? Call us at (407) 312-4803 or click here to contact Rusty's Painting for a free estimate.